How to Create a Gantt Chart in Smartsheet: 7 Steps (2026)
Building a Gantt chart in Smartsheet can feel confusing when your project has dozens of tasks, dependencies, owners, and changing deadlines. One incorrect date can shift an entire delivery plan.
The problem grows when your team tracks work in separate places. You may miss a dependency, overlook an overdue task, or spend hours manually changing dates after one milestone moves.
But here's the truth: Smartsheet makes this process manageable when you build the sheet in the right order. In this guide, I’ll show you seven practical steps for creating a clear Gantt chart, connecting tasks, tracking progress, and keeping the timeline useful throughout 2026.
How to Create a Gantt Chart in Smartsheet: 7 Steps
To create a Gantt chart in Smartsheet, build a project sheet with task names, start dates, end dates, owners, and dependencies. Then switch to Gantt View and configure the timeline.
Here’s the complete process:
- Create or open a project sheet.
- Add the essential project columns.
- Enter tasks and estimate durations.
- Turn on dependencies.
- Connect related tasks.
- Switch to Gantt View and adjust the timeline.
- Track progress and maintain the schedule.
Step 1: Create or open a project sheet
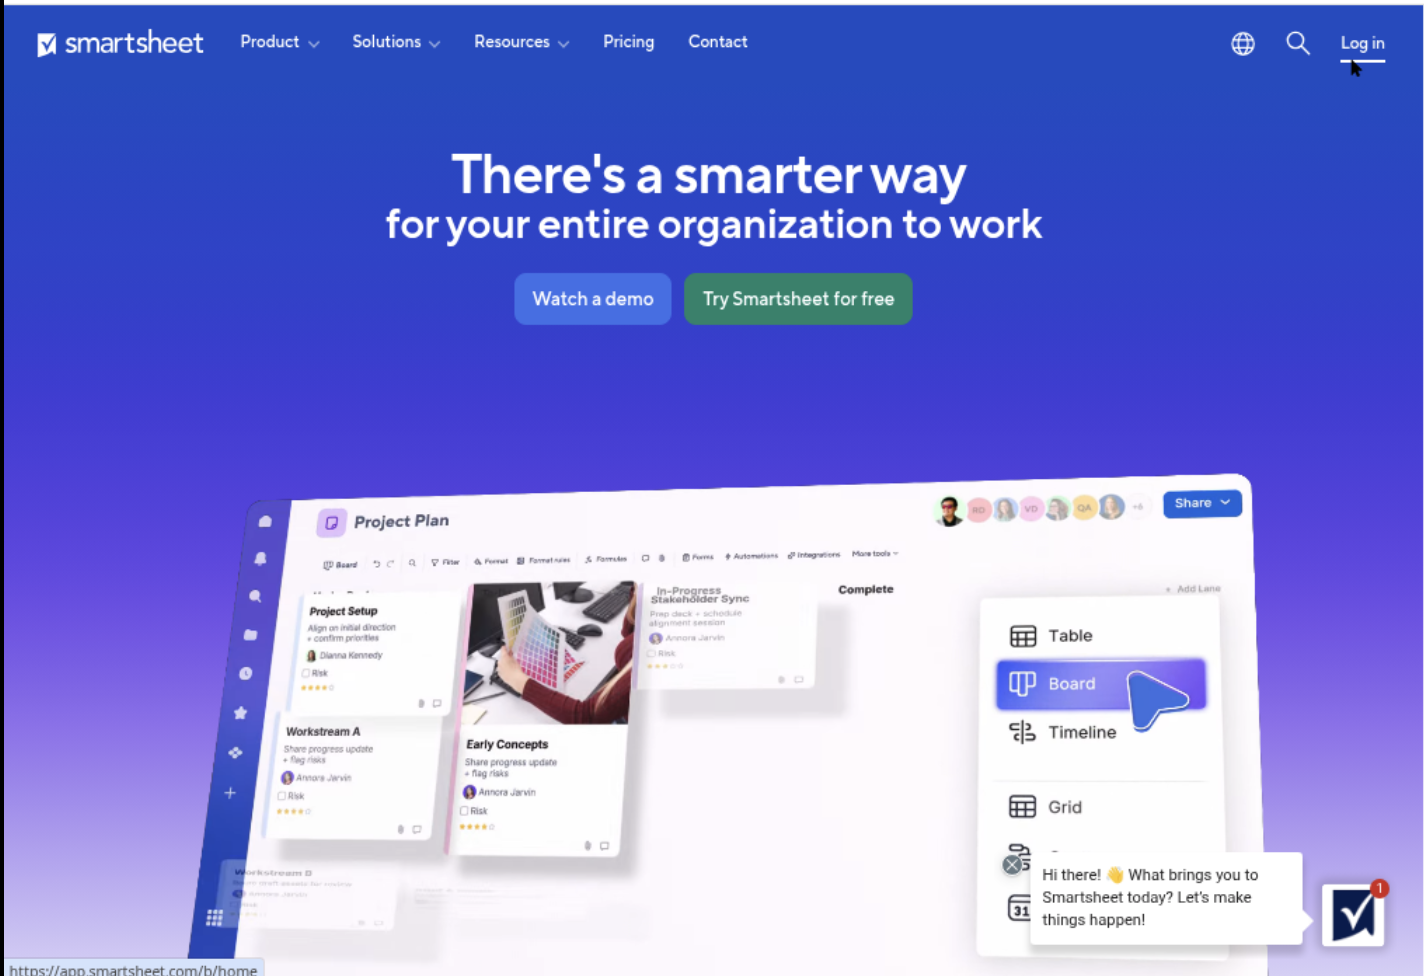
Start by signing in to Smartsheet and creating a new project sheet. You can begin with a blank sheet or select a project planning template.
A blank sheet gives you more control. A template can save time when you already know the type of project you are managing.
For example, a product launch might need phases for research, design, development, testing, marketing, and release. A construction project may need permits, procurement, site preparation, installation, and inspection.
Choose a structure that matches your project. Avoid adding every possible task immediately. Begin with the major phases, then expand each phase into smaller activities.
Step 2: Add the essential project columns
Your Gantt chart needs reliable scheduling fields. At minimum, create or confirm these columns:
- Task Name: describes the work to complete.
- Start Date: shows when work begins.
- End Date: shows when work finishes.
- Duration: calculates the length of each task.
- Predecessor: identifies an earlier task that controls timing.
- Assigned To: identifies the person or team responsible.
- Percent Complete: records progress.
- Notes: captures important context or decisions.
Smartsheet may create several scheduling columns when you enable dependencies. Review the column names before entering a large amount of information.
Here's why: unclear column types create scheduling errors. If a date column contains text, Smartsheet cannot calculate a meaningful timeline.
Step 3: Enter tasks and estimate durations
Enter one task per row. Use specific action-oriented names instead of vague labels.
For example, replace “Website work” with “Approve homepage layout” or “Test checkout form.” A specific task gives your team a clear finish line.
Next, add start and end dates. Smartsheet can calculate task duration when you enter valid dates and enable dependencies.
Break large activities into manageable tasks. A task lasting three months may hide several separate activities, owners, and risks.
For example, divide “Prepare product launch” into these tasks:
- Confirm launch requirements.
- Approve product messaging.
- Design campaign graphics.
- Review campaign graphics.
- Schedule promotional activity.
- Complete launch readiness review.
This level of detail makes the timeline easier to manage. It also helps you identify which activity is delaying the next one.
Step 4: Turn on dependencies
Open the project settings and enable dependencies. Smartsheet will use the start date, end date, duration, and predecessor fields to calculate task relationships.
When dependencies are active, changing one task can affect connected tasks. That reduces manual schedule adjustments.
Before enabling this feature, check that your scheduling columns use the correct formats. Confirm that dates are valid and durations use a consistent unit, such as days.
You might be wondering: what happens if I already entered dates? Smartsheet can use those dates while creating relationships, although you should review the resulting schedule carefully.
Step 5: Connect related tasks
Use the predecessor column to connect tasks. A predecessor is an activity that must happen before another activity can begin or finish.
Suppose “Approve homepage layout” appears in row 12. If “Build homepage” can begin only afterward, enter row 12 as the predecessor for the build task.
Smartsheet supports common dependency relationships, including:
- Finish-to-Start: the second task starts after the first task finishes.
- Start-to-Start: the second task starts after the first task begins.
- Finish-to-Finish: both tasks finish in sequence.
- Start-to-Finish: the second task finishes after the first task starts.
Finish-to-start relationships handle most everyday project schedules. Use other relationship types when activities genuinely overlap.
Here’s a simple example:
| Task | Relationship |
|---|---|
| Approve campaign message | Must finish before design begins |
| Create campaign graphics | Starts after message approval |
| Review campaign graphics | Starts after graphic creation |
| Schedule campaign activity | Starts after graphic approval |
Dependencies show how work flows. They do not replace judgment, so review each connection with the person managing that activity.
Step 6: Switch to Gantt View and adjust the timeline
Open the view selector and choose Gantt View. Smartsheet will display tasks as horizontal bars across a timeline.
The left side shows your task rows. The right side shows dates, durations, milestones, and relationships.
Adjust the timeline scale when necessary. A project lasting several months may work best with a weekly or monthly view. A two-week sprint may require a daily view.
You can also adjust the appearance of the chart by changing colors, grouping tasks, and highlighting critical milestones.
The best part? A Gantt chart becomes easier to read when you show only scheduling information that supports a decision.
Step 7: Track progress and maintain the schedule
Update percent complete, actual dates, task owners, and status information as work progresses.
Do not wait until the end of the project. A Gantt chart loses value when the schedule reflects an old plan.
Set a regular review rhythm. For example, a software team may update the chart every morning, while a marketing team may review it twice each week.
When a task falls behind, check its successor tasks. A delay may affect a milestone, another team, or the final delivery date.
Record the reason for major changes in a notes column. That gives your team useful context during later reviews.
What a Smartsheet Gantt Chart Shows
A Gantt chart turns project timing into a visual schedule. Each horizontal bar represents a task, while its position shows when the work starts and ends.
Milestones usually appear as single points in time. They can represent approvals, releases, inspections, or other important events.
Dependencies connect tasks visually. When one activity moves, connected activities may move too, depending on their relationship and project settings.
For example, a mobile app launch might include a “Submit for app review” milestone. The chart can show that testing must finish before submission.
Tasks, phases, and milestones
Use indentation to organize tasks under larger phases. A phase such as “Quality Assurance” may contain test planning, test execution, defect review, and approval.
This hierarchy helps you understand both the overall schedule and the daily workload.
Milestones should represent meaningful events. Avoid adding a milestone for every small action, or important dates may become difficult to spot.
Critical work and schedule risk
Some tasks have more scheduling influence than others. A delay on a task with several successors can create a larger problem than a delay on an independent activity.
Review the longest connected sequence of dependent work. This sequence often deserves the closest attention because it controls the delivery date.
For example, approval delays may affect design, development, testing, and release. A team that monitors only development may discover the risk too late.
How to Build a More Reliable Project Schedule
A visually attractive chart can still produce poor decisions. The schedule becomes reliable when task estimates, relationships, and ownership reflect real work.
Start with the project outcome. Then work backward from the required delivery date and identify the activities that must happen first.
For a training program, the sequence may look like this:
- Define learning objectives.
- Write the training content.
- Review the material.
- Design presentation slides.
- Prepare exercises.
- Run a pilot session.
- Apply improvements.
- Deliver the program.
That sequence gives you a practical starting point. You can then identify activities that may happen at the same time.
Let me explain: parallel work can shorten the schedule, but it may increase coordination needs. Design and content writing may overlap, although each team needs clear review points.
Use realistic estimates
Estimate the time required for active work, reviews, waiting periods, and approvals. A task that takes two hours to complete may still require two days on the schedule.
For example, a legal review may need one business day even when the actual reading takes only 30 minutes.
Include public holidays, team availability, and planned leave when they affect delivery. Smartsheet’s scheduling calculations are only as useful as the assumptions behind them.
Assign one accountable owner
Each task should have one person or clearly defined team responsible for moving it forward.
Several people may contribute, but unclear ownership creates delays. “Marketing team” may be too broad for a time-sensitive approval.
Use a named owner for important tasks. You can still mention contributors in notes or a separate collaboration field.
Common Gantt Chart Mistakes to Avoid
Many scheduling problems begin before anyone opens the chart. Teams often create vague tasks, connect every activity, or set deadlines without discussing capacity.
Here are frequent mistakes and practical fixes:
| Mistake | Better approach |
|---|---|
| Using broad task names | Write specific actions with visible completion criteria. |
| Adding too many dependencies | Connect relationships that genuinely control timing. |
| Ignoring approval time | Add review and decision activities to the schedule. |
| Assigning several owners | Choose one accountable owner and list contributors separately. |
| Leaving completed work unchanged | Update progress and actual dates during regular reviews. |
| Making every activity a milestone | Reserve milestones for important events and decisions. |
But here's the truth: a chart cannot solve an unclear plan. If the team has not agreed on scope or ownership, visual scheduling only makes the confusion easier to see.
Do not schedule every minute
Detailed planning helps, but excessive precision can make a schedule fragile. A task planned for exactly 2.5 hours may shift when a review takes longer.
Use enough detail to manage dependencies and accountability. Leave reasonable flexibility for work that contains uncertainty.
Separate planning assumptions from commitments
Early dates are often estimates. Label them clearly during planning conversations.
Once a date is approved, treat it as a commitment that requires active management. This distinction helps your team discuss risk before a missed deadline becomes a surprise.
How to Use the Chart During Project Reviews
A Gantt chart should support conversations, not sit untouched after planning. Use it during weekly reviews to compare planned progress with actual progress.
Ask three practical questions:
- Which tasks should have finished by now?
- Which upcoming tasks depend on delayed work?
- Which decision could protect the delivery date?
For example, if testing is two days late, the team might add a tester, reduce the testing scope, or move the release date.
The chart helps you see the consequence of each choice. It does not make the decision for you.
Use status information consistently
Choose a small set of status labels, such as Not Started, In Progress, At Risk, Blocked, and Complete.
Define each label so different people apply it consistently. “At Risk” should mean the task may miss its date, while “Blocked” should mean progress cannot continue without action.
Color coding can make these conditions easier to scan. Use a limited palette so urgent items remain visible.
Review changes with the right people
Invite task owners to review dates they control. A project coordinator may maintain the chart, but the person doing the work understands practical constraints.
When a date changes, ask what caused the change and which later activities it affects. This creates a stronger schedule than simply moving bars until the chart looks acceptable.
Natural Smartsheet Alternative: ONES.com

Value Proposition
ONES.com combines project management and knowledge management on one platform, with AI support through ONES Assistant. ONES Project is the project management product and a Jira alternative, while ONES Wiki provides knowledge management as a Confluence alternative.
ONES Project can help teams manage schedules, workflows, reporting, and delivery planning when they need more control than a single planning sheet provides.
Core Capabilities
- Scattered project information → Unified project workspace → Keep tasks, status updates, and planning details connected in one project environment.
- Manual schedule maintenance → Dependency-aware planning → Connect related work and reduce repeated date adjustments.
- Rigid workflows → Custom workflows and fields → Adapt project stages and properties to match your approval process.
- Limited progress visibility → Built-in reporting → Give project leads clearer views of status, workload, and delivery risks.
- Plugin-heavy setup → Native project features → Manage sprint planning, automation, and reporting with fewer additional plugins.
- Jira migration concerns → Jira-compatible workflows → Support teams that need familiar issue and delivery patterns while evaluating a Jira alternative.
- Restricted deployment requirements → Four deployment options → Choose Cloud, On-Premise, Private Cloud, or Air-gapped deployment.
- Different capabilities across hosting models → Feature parity → Use the same core capabilities across cloud and self-hosted versions.
- Early adoption costs → Free plan for up to 30 seats → Give a small team room to evaluate the platform before making a broader commitment.
Application Scenarios
A software team can use ONES Project to manage sprint work, connect dependencies, automate status changes, and review delivery reports. A project lead might create a workflow that moves an item to testing after development approval.
An organization with restricted network requirements can choose an on-premise or air-gapped deployment. This can support internal project coordination where cloud access is unsuitable.
A growing team can combine ONES Project with ONES Wiki when project decisions, procedures, and delivery work need a connected knowledge space. The products are sold separately, so you can choose the combination that fits your needs.
Common Challenges When Creating a Smartsheet Gantt Chart
Challenge: Dates shift unexpectedly
Problem: A predecessor, duration, or dependency setting may cause a task to move when another date changes.
Solution: Review the predecessor column and confirm that each relationship reflects the real workflow. Check whether the task should be linked or scheduled independently.
Challenge: The chart becomes too crowded
Problem: Hundreds of rows make it difficult to identify milestones and urgent work.
Solution: Group tasks into phases, collapse completed sections, and create focused views for different audiences. Keep the master schedule detailed while giving executives a simpler summary.
Challenge: Progress updates are inconsistent
Problem: One person marks work complete at 100 percent, while another uses 90 percent for nearly finished work.
Solution: Define progress rules. For example, use 100 percent only after the owner confirms that the task meets its completion criteria.
Challenge: The plan ignores capacity
Problem: Several tasks are assigned to one person during the same period.
Solution: Review assignments alongside the timeline. Move lower-priority work, add support, or adjust the delivery date before the conflict becomes a delay.
Challenge: Dependencies do not reflect reality
Problem: The chart shows a neat sequence, while team members perform work in parallel.
Solution: Discuss the actual workflow with task owners. Connect only relationships that affect timing, and allow parallel work where appropriate.
FAQs About Creating a Gantt Chart in Smartsheet
Does Smartsheet automatically create a Gantt chart?
Smartsheet can display a project sheet as a Gantt chart after you add suitable date columns and choose Gantt View. For scheduling features, you may also need to enable dependencies and confirm the correct project settings. A chart appears quickly, but the quality of the schedule depends on accurate tasks, dates, relationships, and ownership.
What columns do I need for a Smartsheet Gantt chart?
You generally need a task name column, start date, end date, and duration. Add predecessor, assigned owner, percent complete, status, and notes columns for stronger project control. When dependencies are enabled, Smartsheet may create or use additional scheduling fields. Review the column types before entering extensive planning details.
Can I create dependencies between tasks?
Yes. Enable dependencies and use the predecessor column to connect related tasks. A predecessor identifies work that controls another task’s timing. Finish-to-start relationships are common, such as requiring design approval before development begins. Review every connection because an incorrect predecessor can move dates across the wider schedule.
How often should I update the chart?
Update it according to the project’s pace and risk. A software sprint may need daily updates, while a longer marketing campaign may need two reviews each week. Update progress, actual dates, ownership, and risks during each review. A schedule that remains unchanged for several weeks may no longer represent actual work.
Can I use a Smartsheet Gantt chart for multiple teams?
Yes. Use phases, owners, status fields, and clear task naming to coordinate multiple teams. Create filtered views when each group needs a focused schedule. Keep shared milestones visible so teams understand how their work affects the final outcome. Regular cross-team reviews help reveal dependencies that one group may miss.
Conclusion
Creating a Gantt chart in Smartsheet takes seven main steps: build the sheet, add scheduling fields, enter tasks, enable dependencies, connect related work, open Gantt View, and maintain progress.
The biggest improvement usually comes from clearer task names and realistic relationships. A chart with fewer, better-defined tasks can support stronger decisions than a crowded schedule filled with vague activities.
When delays appear, use the timeline to identify affected work, discuss practical options, and protect the most important milestone.
But here's the truth: the tool is only part of the solution. A clear workflow, accountable ownership, and regular schedule reviews keep the plan useful after the chart is created.